Setting up and running a live lesson
A live lesson is 60 minutes in 7 blocks. You teach from the board and press Next; pupils follow, answer and work on their own devices, and the class’s results appear on your screen as they go.
Before you start
- A class in My classes, with every pupil’s account added.
- A projector or board for the board screen, and your own laptop for the teacher screen.
- A device for each pupil (Chromebook, laptop, tablet or phone) that can open teachio.co.uk.
Step 1
Pick a class and a lesson
Go to My classes and open the Live lesson tab. Choose the Class, choose the lesson (there is one live lesson for each learn-guide lesson), then press Start live lesson.
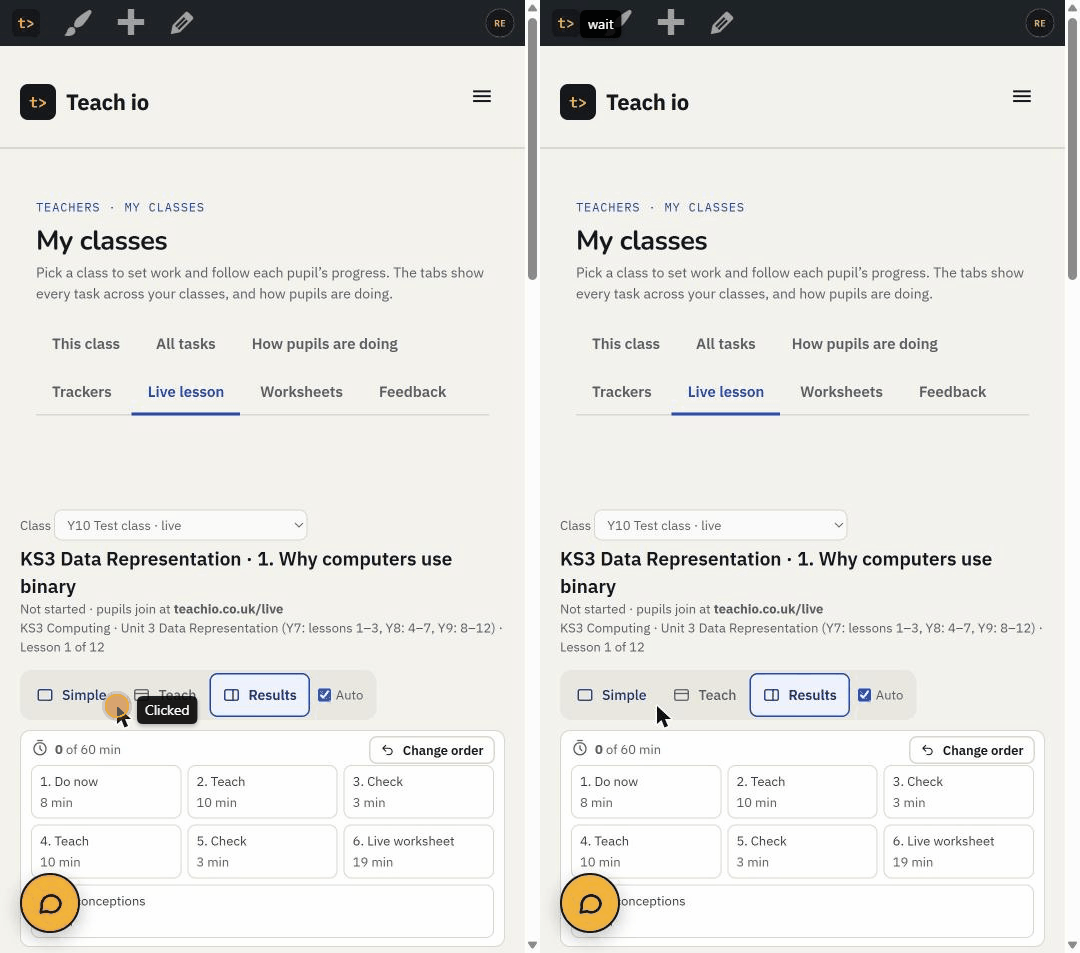
Tip: Edit this lesson lets you change the check questions, add your own notes, hide steps and change timings. It saves as your version; the Teach io lesson is never changed.
Step 2
Open the board
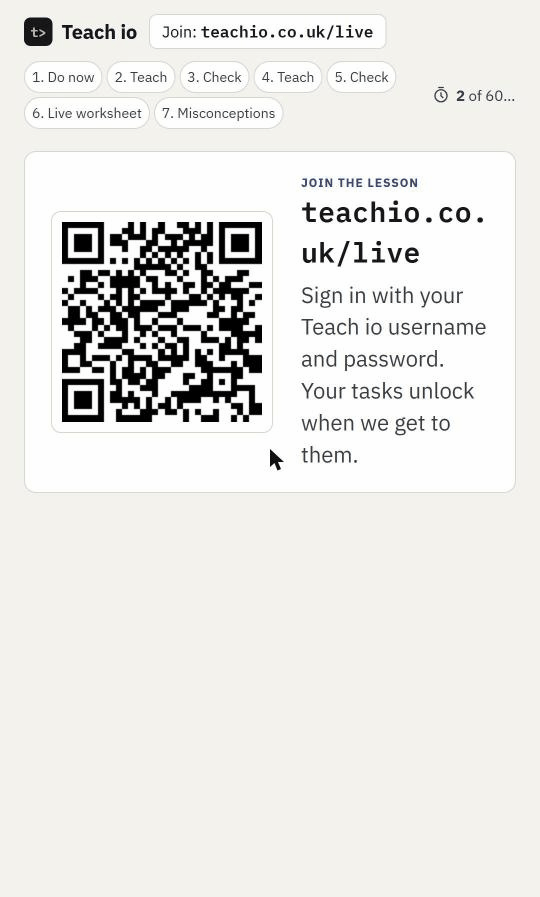
You now have the teacher screen on your laptop: the controls, and every pupil’s answers. Open the Board for the class from Teachers › Live lessons and put it on the projector. Before you start it shows a QR code and teachio.co.uk/live; after that it shows only what the class should see.
Step 3
Pupils join at teachio.co.uk/live
Pupils sign in with their Teach io username and password and go to teachio.co.uk/live (or scan the QR code). There is no code to type: Teach io knows their class, so the lesson opens by itself and follows the board. Pupils can also Ask your teacher a question, and see that lesson’s homework in the learn guide.
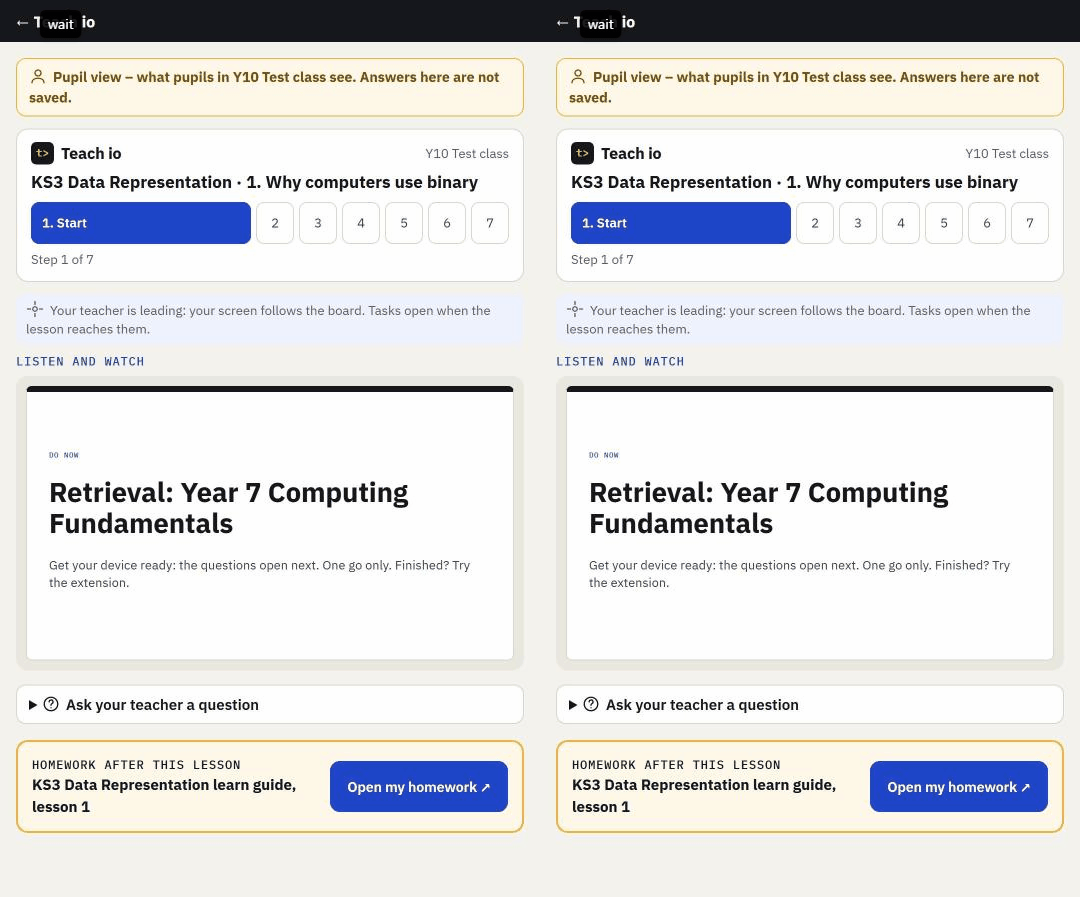
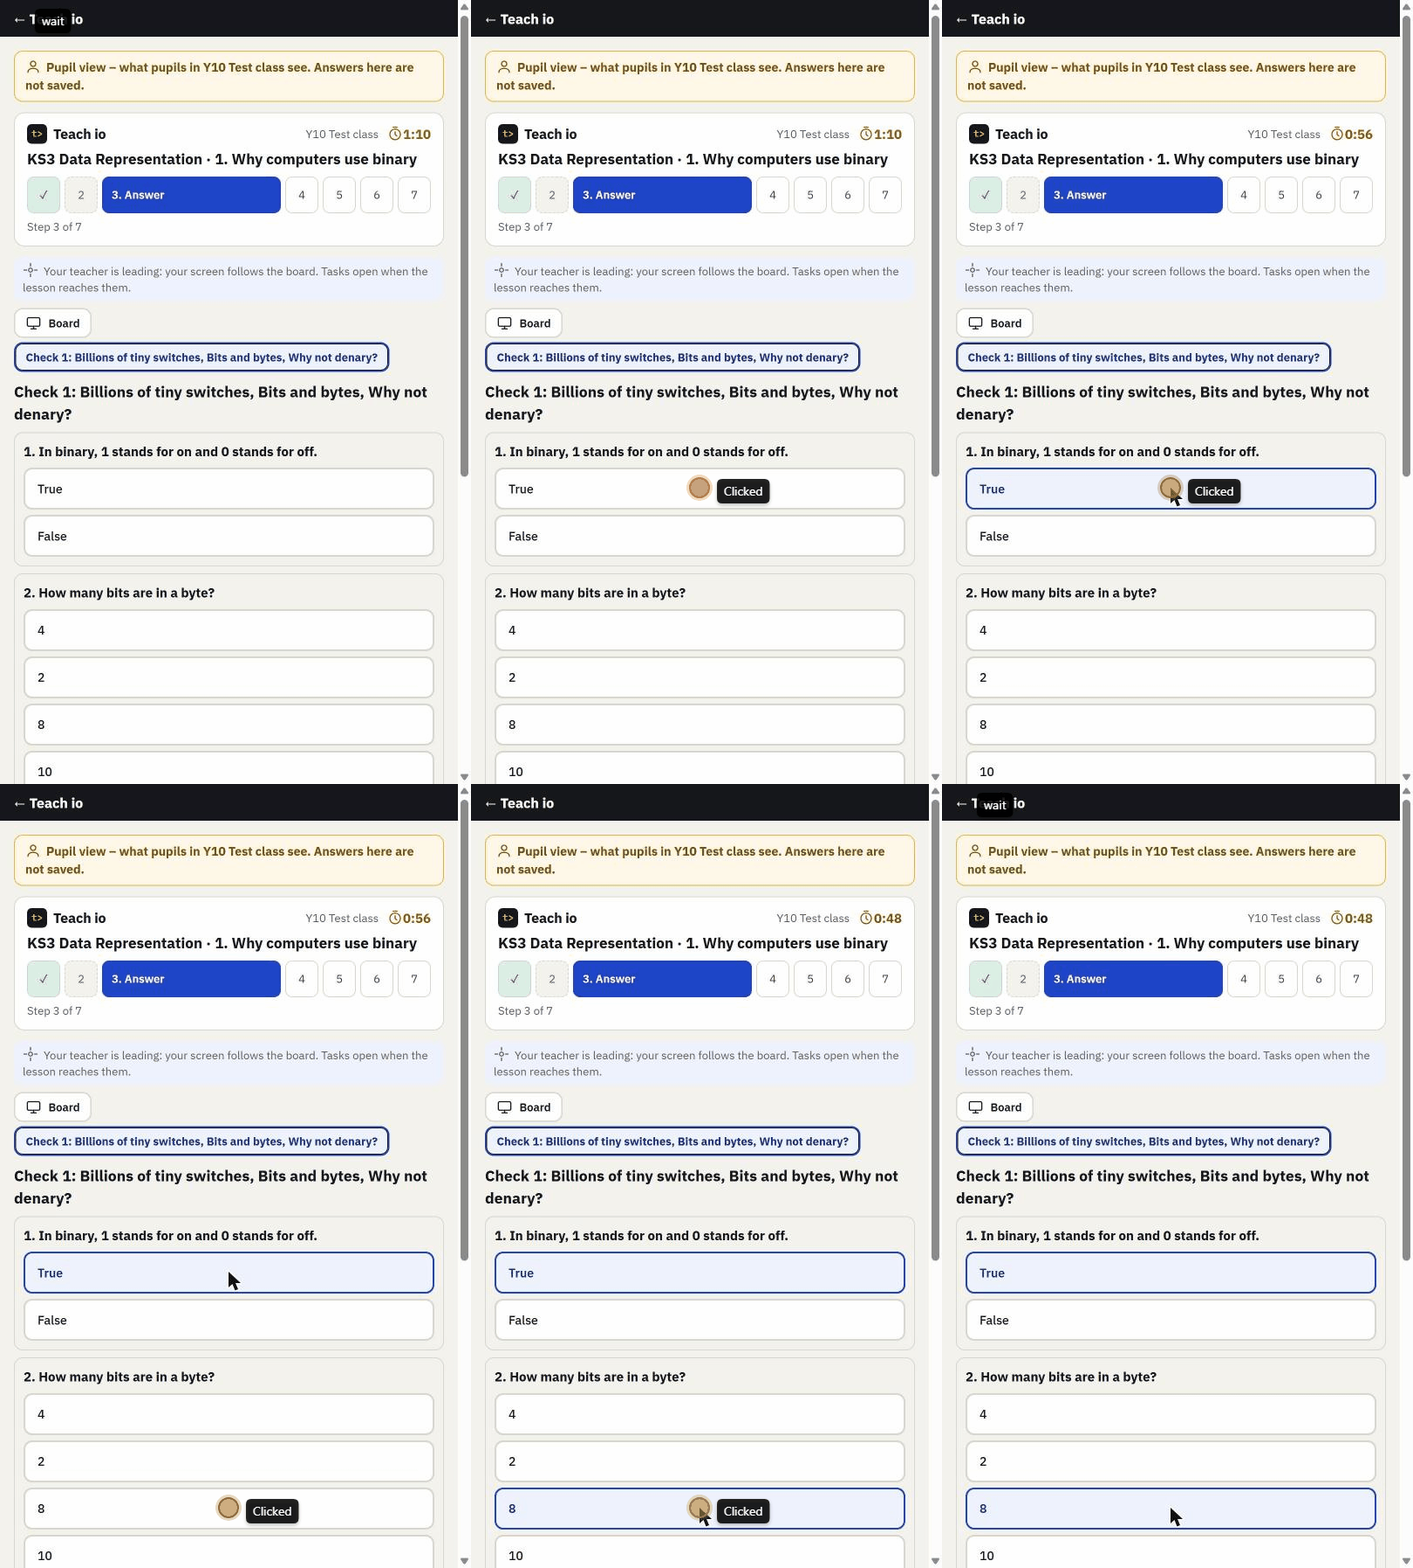
Tip: to see exactly what pupils see, open Pupil view for the class (Teachers › Live lessons). Answers there are not saved.
Step 4
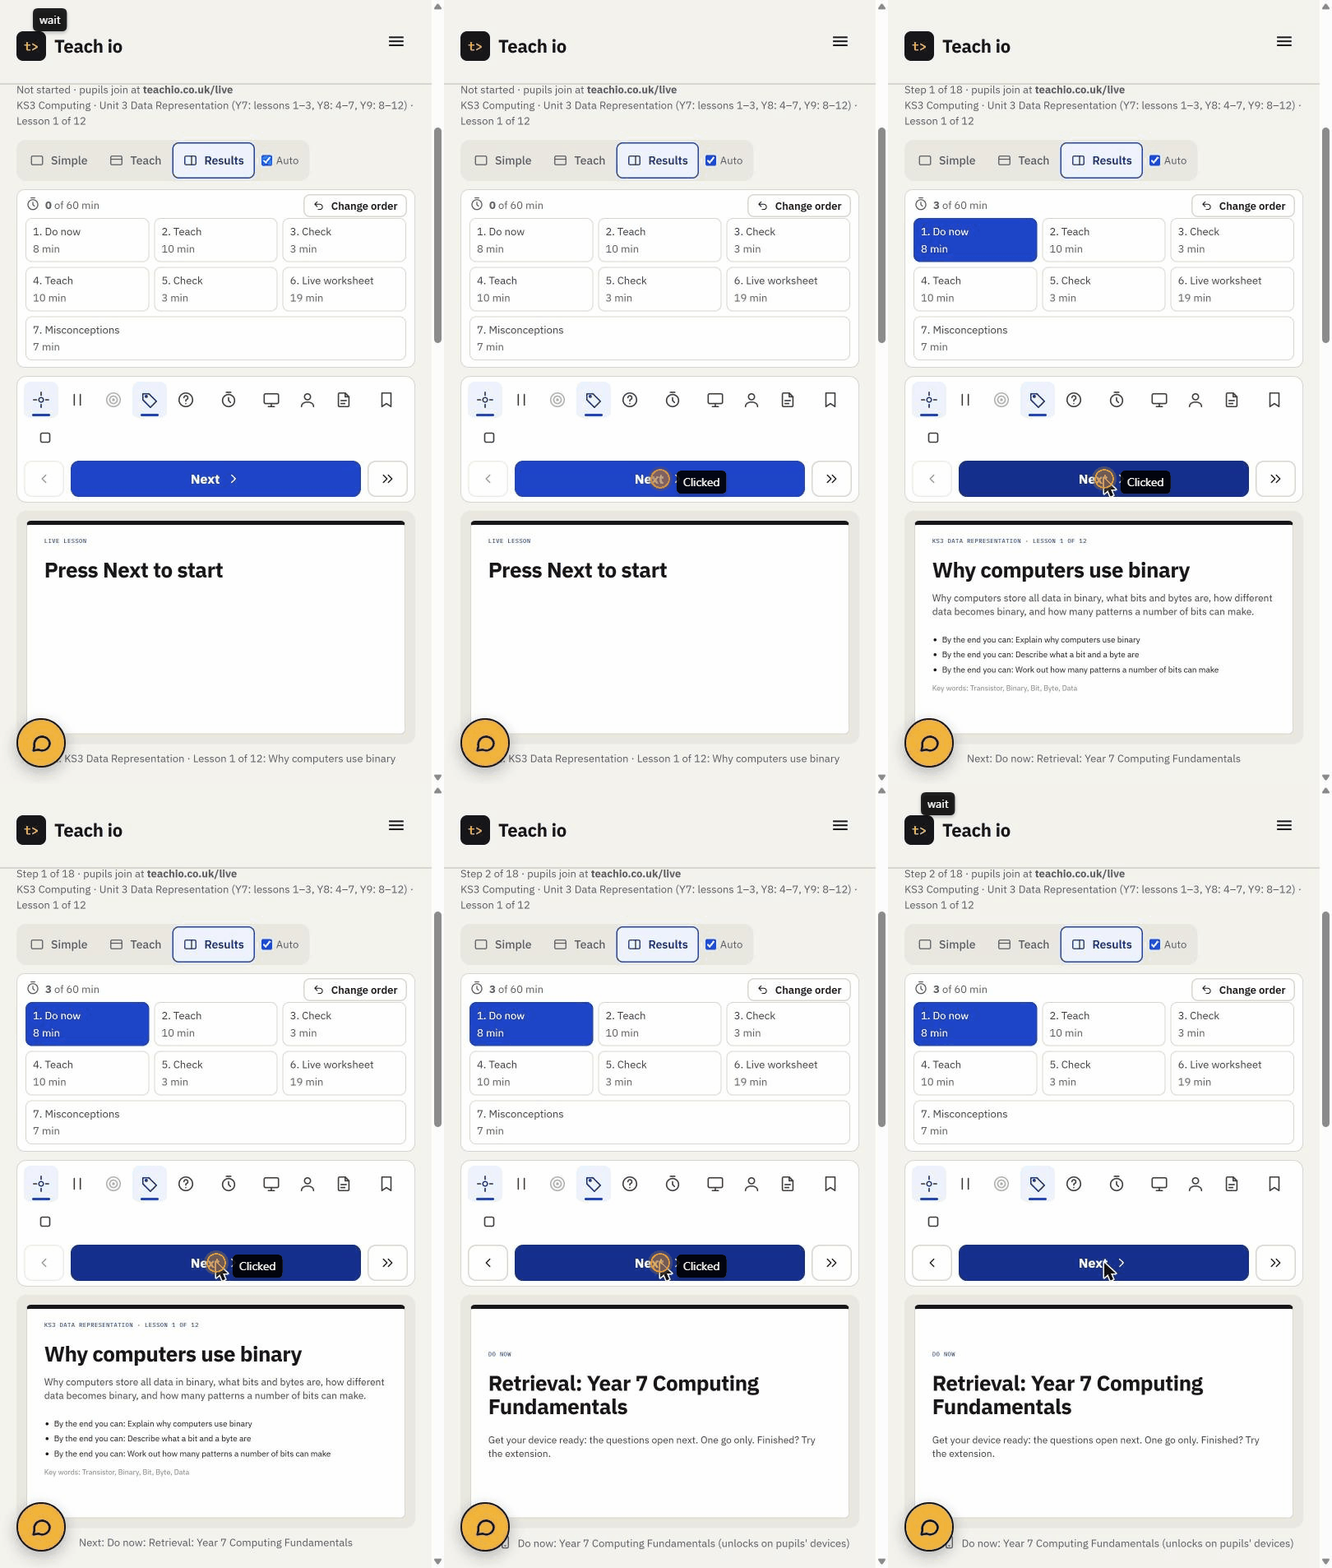
Move through the 7 blocks
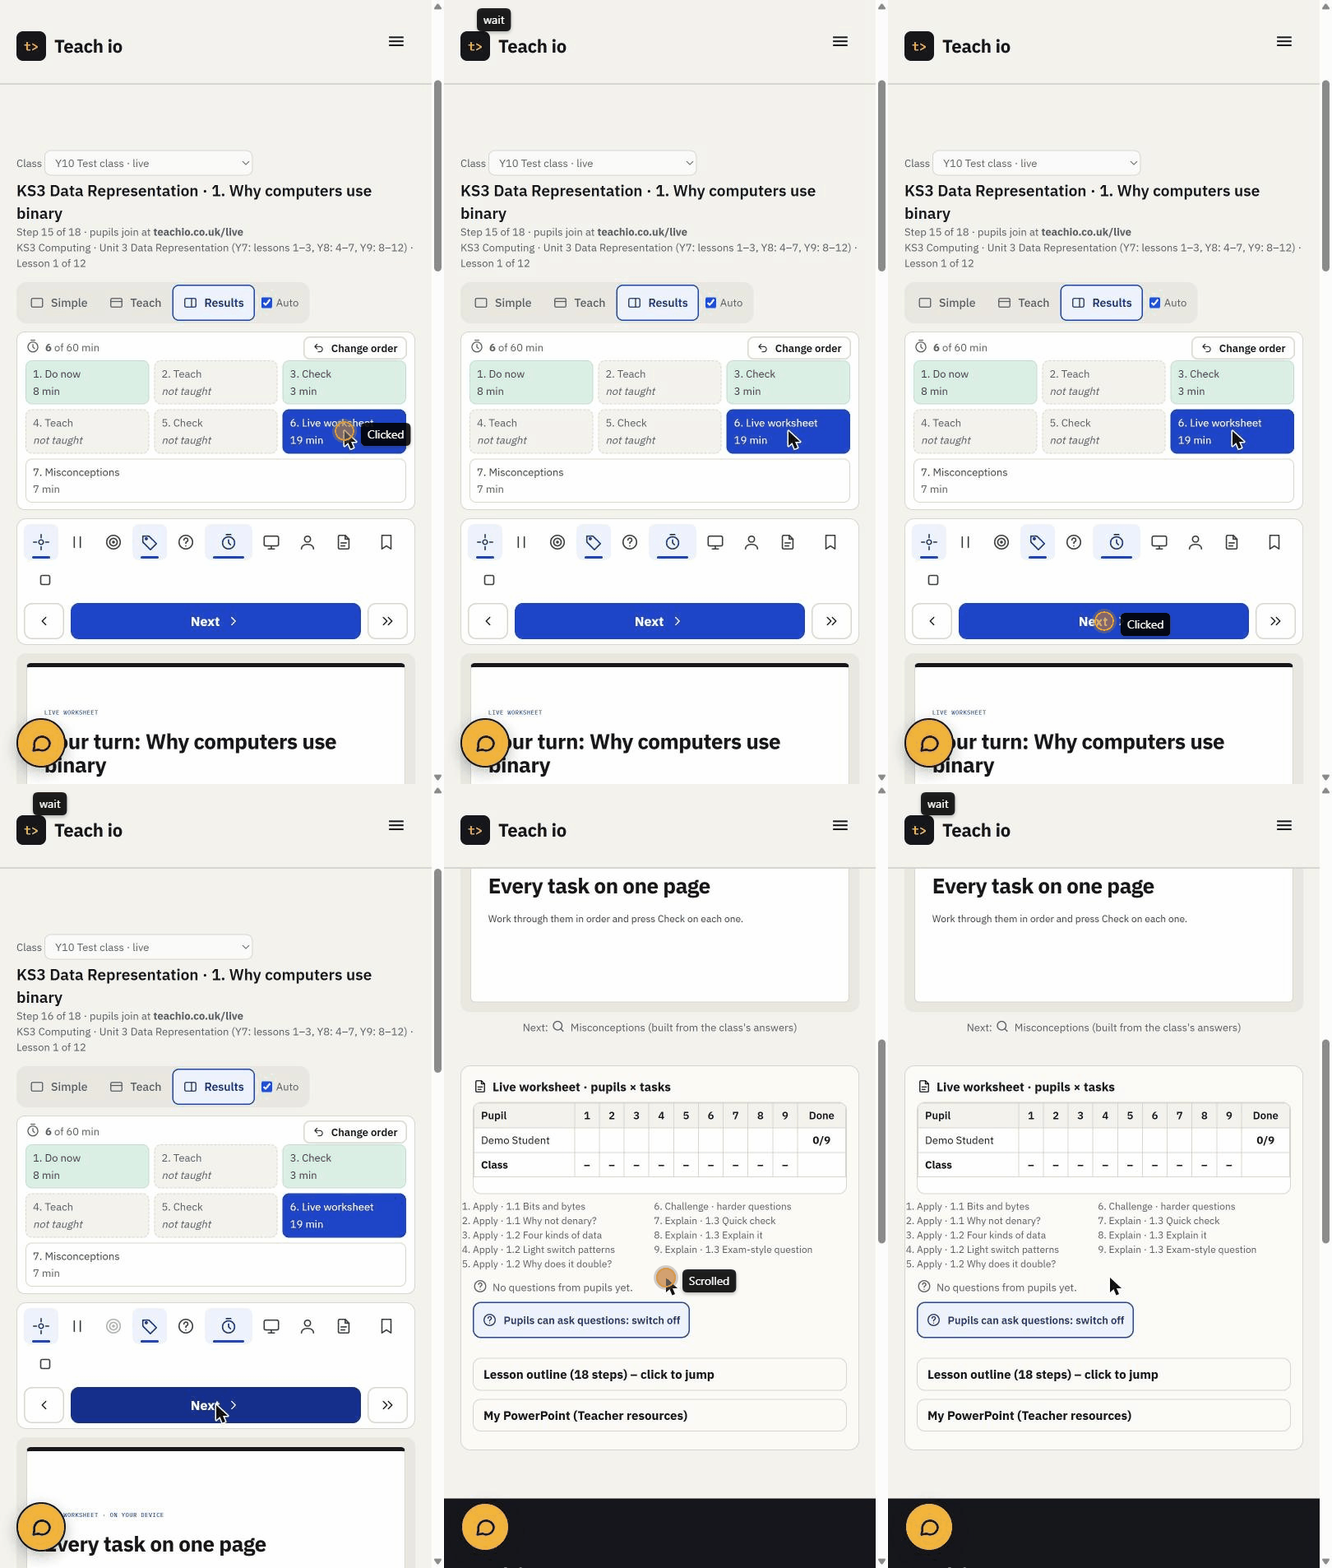
Press Next to show the next point; pupils’ screens follow within a few seconds. » shows the whole next slide at once. The strip at the top shows each block and the minutes used out of 60: done blocks turn green, skipped ones say “not taught”. Tap a block to jump to it, or use Change order.
| Block | Minutes | What happens |
|---|---|---|
| 1 Do now | 8 | Retrieval questions, an extension for fast finishers and the homework target |
| 2 Teach | 10 | Slides, one point at a time |
| 3 Check | 3 | Quick questions on every pupil’s device |
| 4 Teach | 10 | The second teaching block |
| 5 Check | 3 | The second check |
| 6 Live worksheet | 19 | Every task on one page; you watch the grid |
| 7 Misconceptions | 7 | Built from this class’s wrong answers |
The toolbar above Next has the rest: Follow me (pupils’ screens follow the board), Eyes on me (pause pupils’ screens), pick a pupil at random, Names on the board, pupils’ questions, a timer, your own PowerPoint, Finish later and End. Hover over any button to see what it does.
Step 5
Checks and reveal
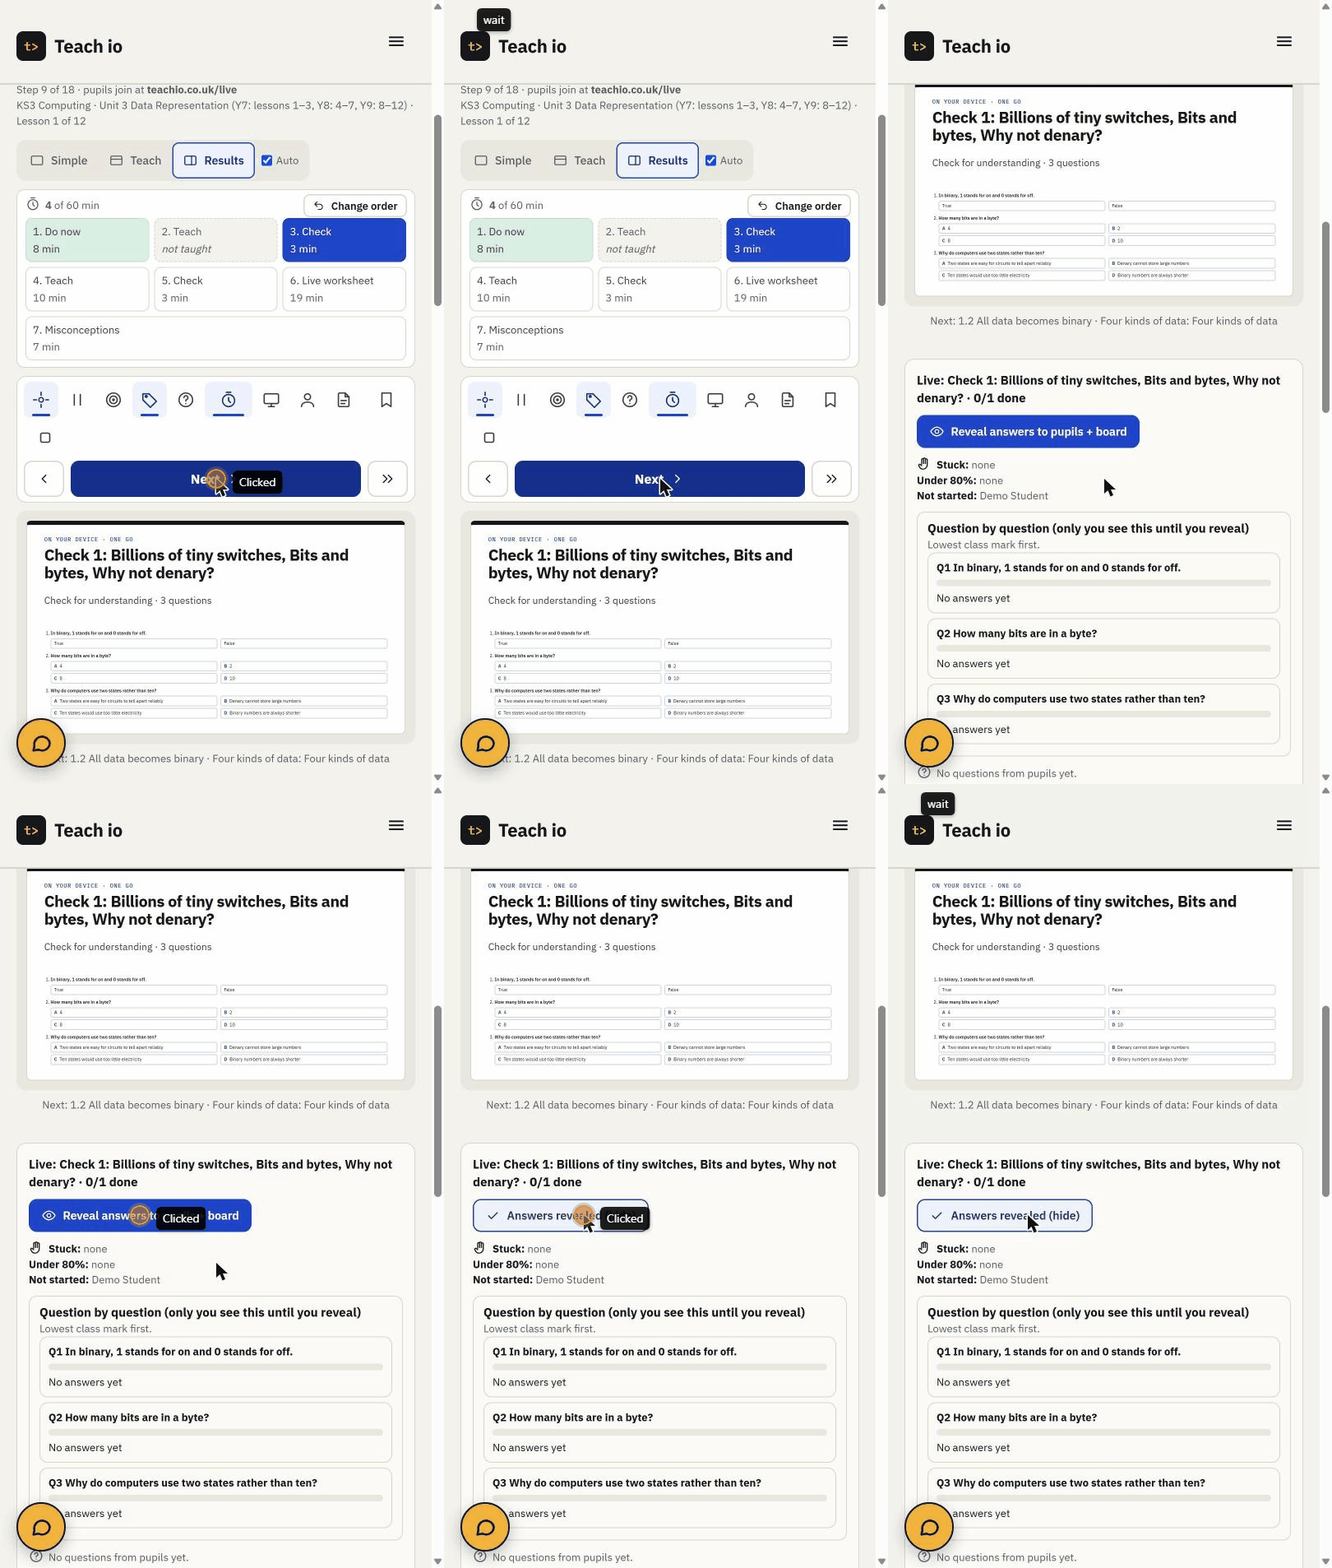
A Check is 3 quick questions on every pupil’s device with a 2-minute timer. Nobody sees right or wrong until you press Reveal answers to pupils + board. Before that, your screen shows who is stuck, who is under 80% and who hasn’t started, question by question, so you can decide whether to reteach or move on.
Step 6
The live worksheet
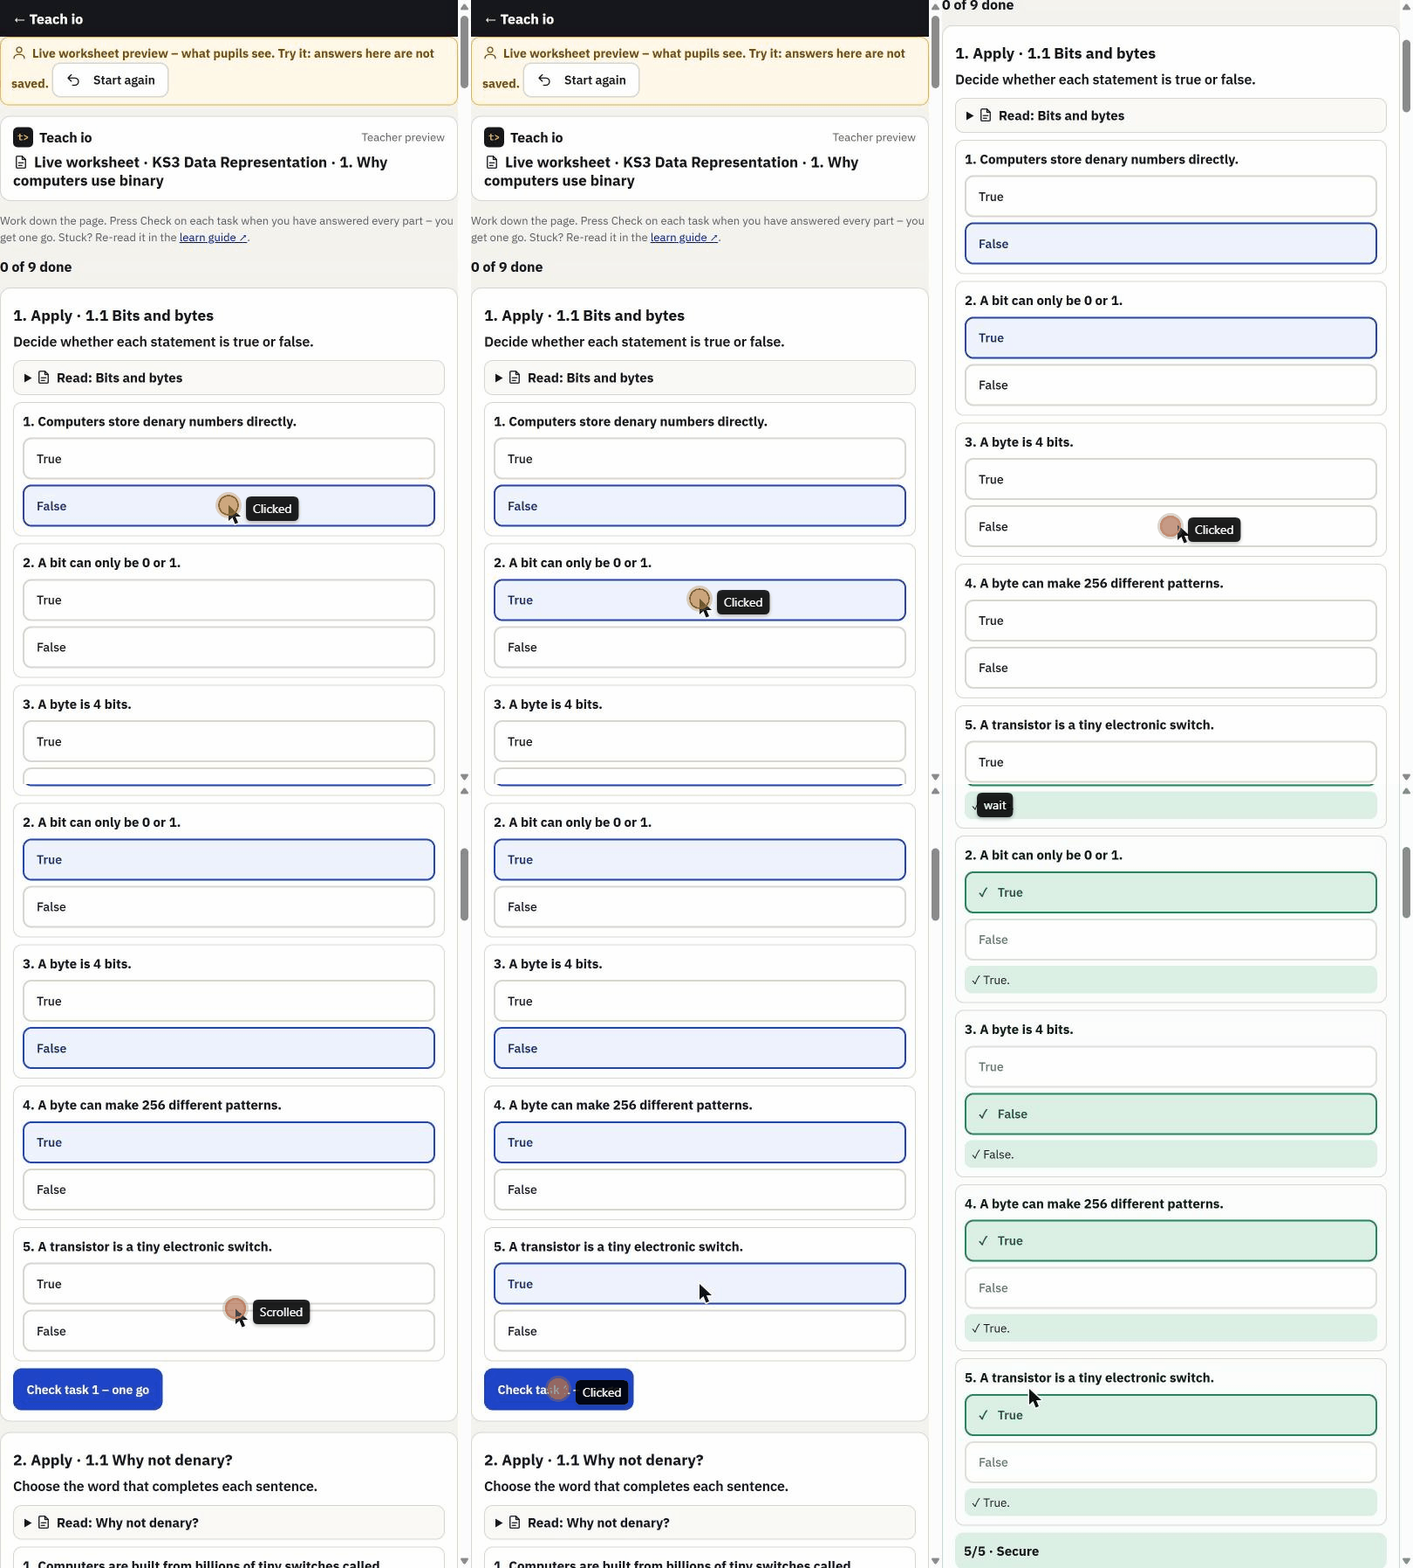
Block 6 opens the worksheet on every pupil’s device: all the tasks on one page. Pupils work down the page and press Check on each task – one go per task. Your screen shows a grid of pupils by tasks with a Done count, so you can see who is stuck and go to them.
Step 7
The storyboard task
Some lessons (for example the BTEC DIT Component 1 PeaShoot lessons) include a storyboard task, where pupils plan what each screen will show. Pupils open it from the Storyboards button on the worksheet, and the same storyboard is linked from their homework so they can finish it later. You find the class’s storyboards under My classes › Worksheets, below the grid. Lessons without a storyboard task don’t show the button.
Step 8
Run out of time? Finish later
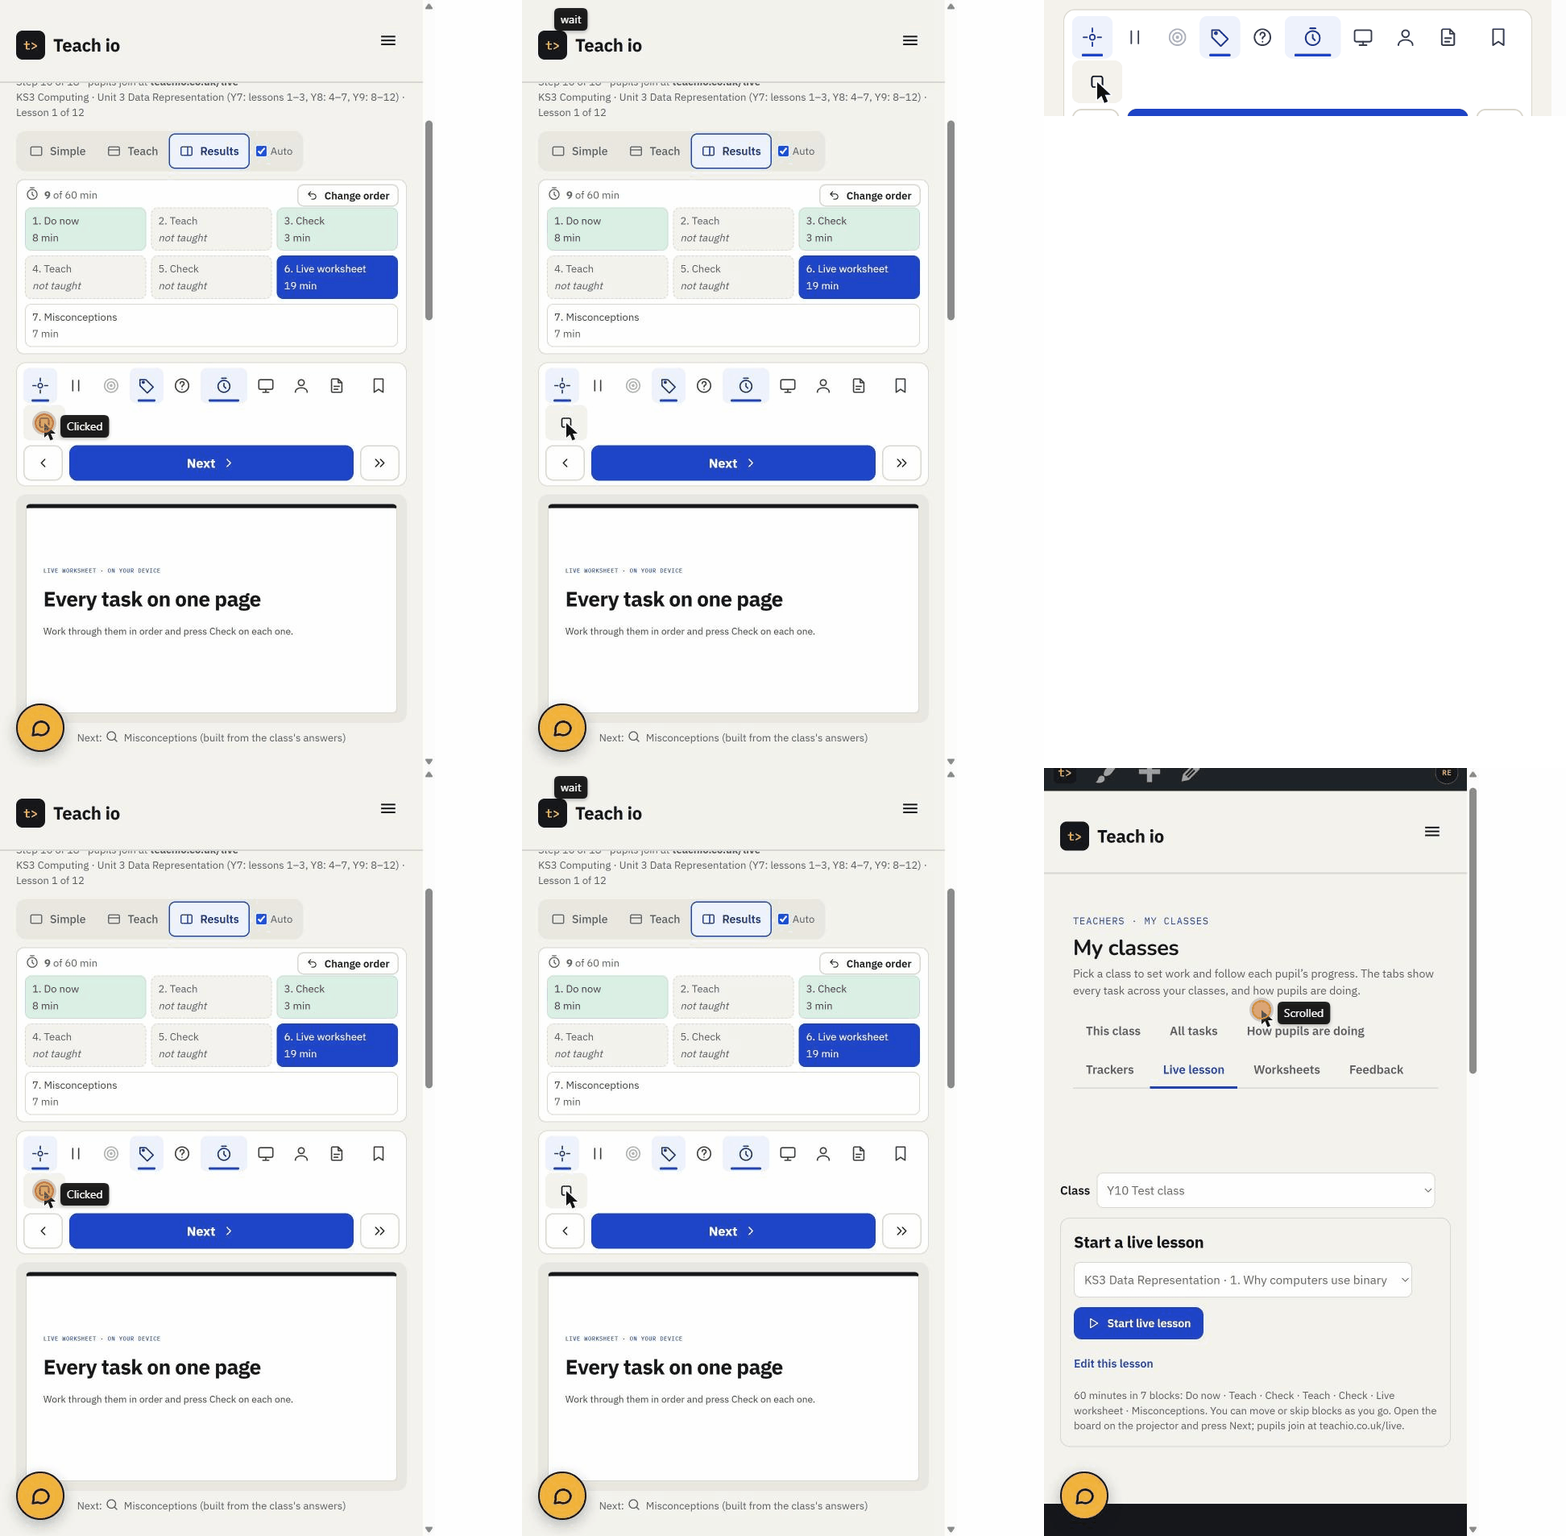
Press Finish later (the bookmark button), then Sure? to confirm. Teach io keeps your place. Next lesson, open the same class and lesson and choose to carry on from the same point with the same answers, or start again.
Step 9
End the lesson
Press End, then Sure?. Pupils’ screens close the lesson and everything they wrote is kept. The Live lesson tab goes back to Start a live lesson.
Tip: give pupils a few seconds to finish typing before you press End.
Step 10
Results afterwards
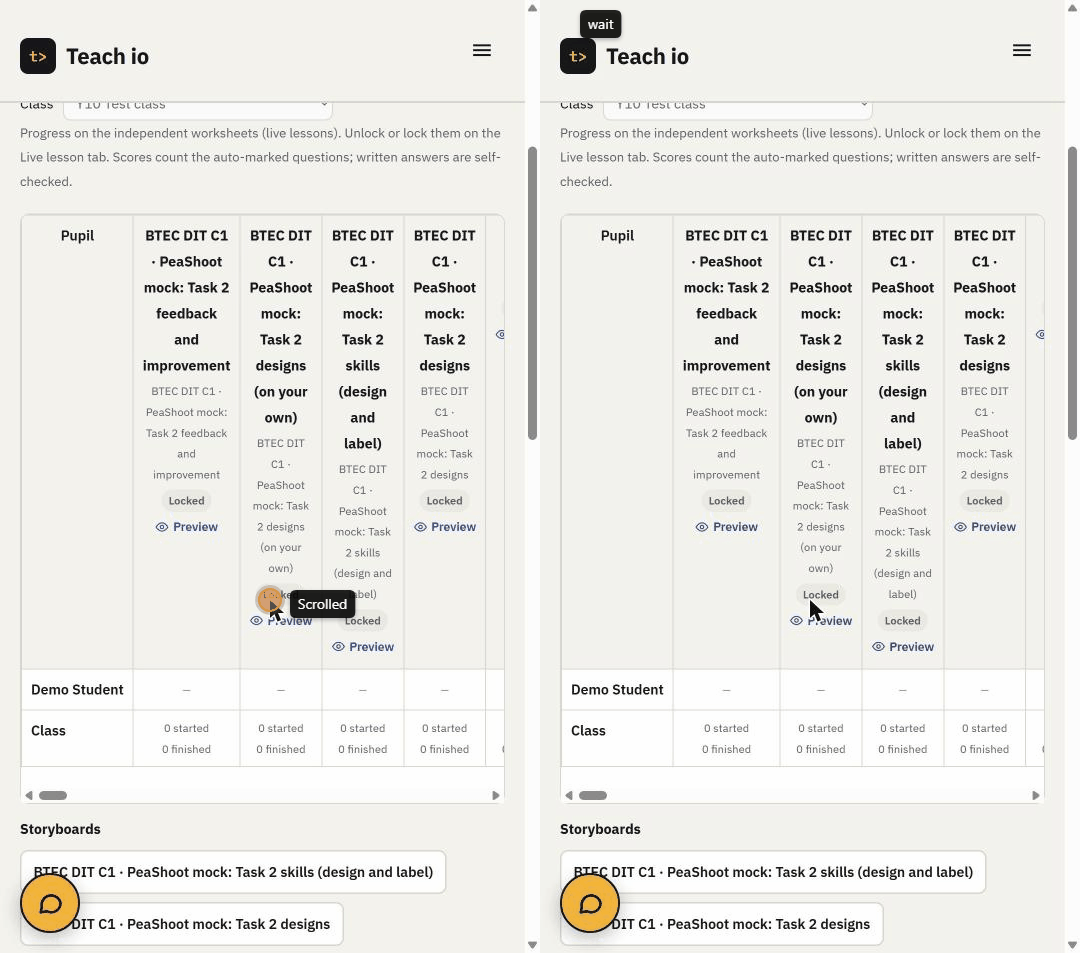
Open My classes › Worksheets and choose the class. It shows each pupil’s progress on every live-lesson worksheet: tasks started and finished, with scores for the auto-marked questions (written answers are self-checked). Use Preview to see a worksheet, and the Storyboards list below for storyboard tasks. Pupils find their finished worksheets in My book, where they can improve answers in green pen.
Questions
Do pupils need their own accounts?
Yes. Each pupil signs in with their own Teach io username and password, so their answers are saved to their own book.
Do I need a code for pupils to join?
No. Pupils go to teachio.co.uk/live, or scan the QR code on the board, and the lesson for their class opens by itself.
Can I change the order of the blocks?
Yes. Tap a block in the strip to jump to it, or use Change order. Blocks you skip show as “not taught”.
Can I change the questions?
Yes. Edit this lesson lets you change the check questions, add notes, hide steps and change timings. It saves as your own version.